PicoSwitch application note
Radio controlled digital camera for aerial photography
This guide will show you how to use a PicoSwitch to trigger the shutter of a digital camera mounted in your radio control airplane. PicoSwitch's relay will replace the mechanical switch of the digital camera, meaning that you don't have to mess around with transistors and digital logic levels that will be different in every camera. By following the instructions in this guide, you should get a good idea of how to modify any digital camera to be radio controlled. Basically all you have to do is to take some wires leading from the switch terminals in the camera and connect them to your PicoSwitch.
The camera I used was a Philips P44417S purchased at Wal-Mart for $15. It was the smallest, lightest and cheapest camera I could find, weighing in at 35g/1.2oz. It has a maximum resolution of 352x288, which is just barely enough for a first-time aerial photograhy trial. Anyone serious about aerial photography should get a nicer camera than this, and apply the same techniques to modify it for remote control use.


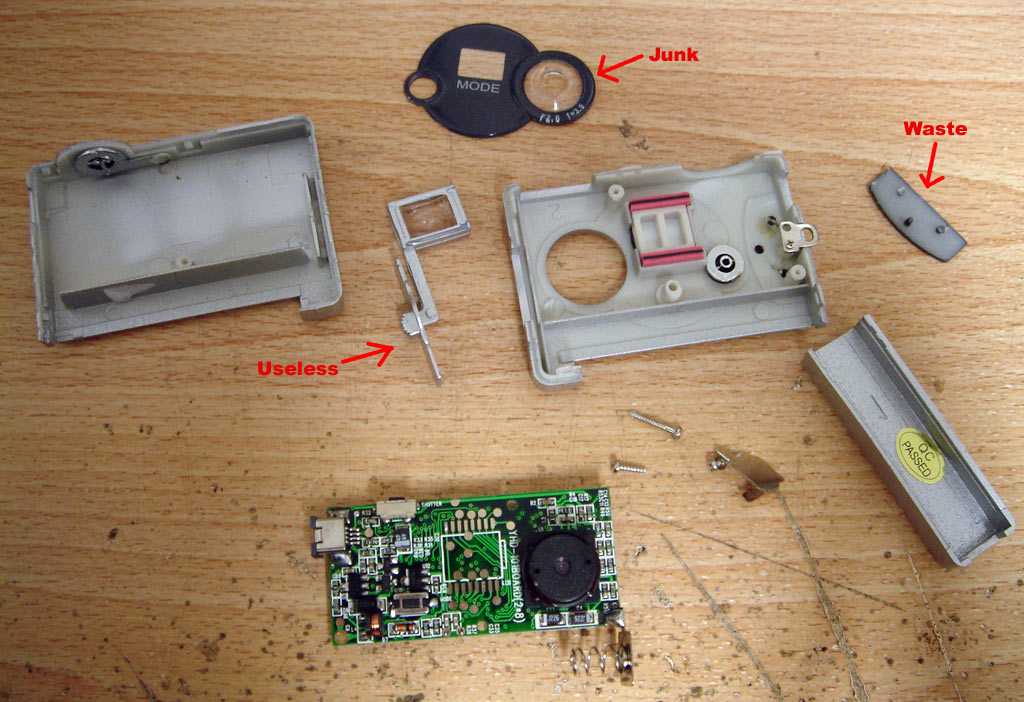
The first step is to remove the keychain.

If you remove the pieces of plastic on the front panel you will see a small screw that will help you open the camera. Throw the pieces of plastic away because they just add unnecessary weight.

Remove the plastic cover on the back, and you will see some more screws that need to be removed before you can reach the shutter switch.

At this point I recommend throwing the 'viewfinder' away because it has about as much functionality and clarity as beer goggles. You can use it to stir your coffee while your soldering iron warms up.

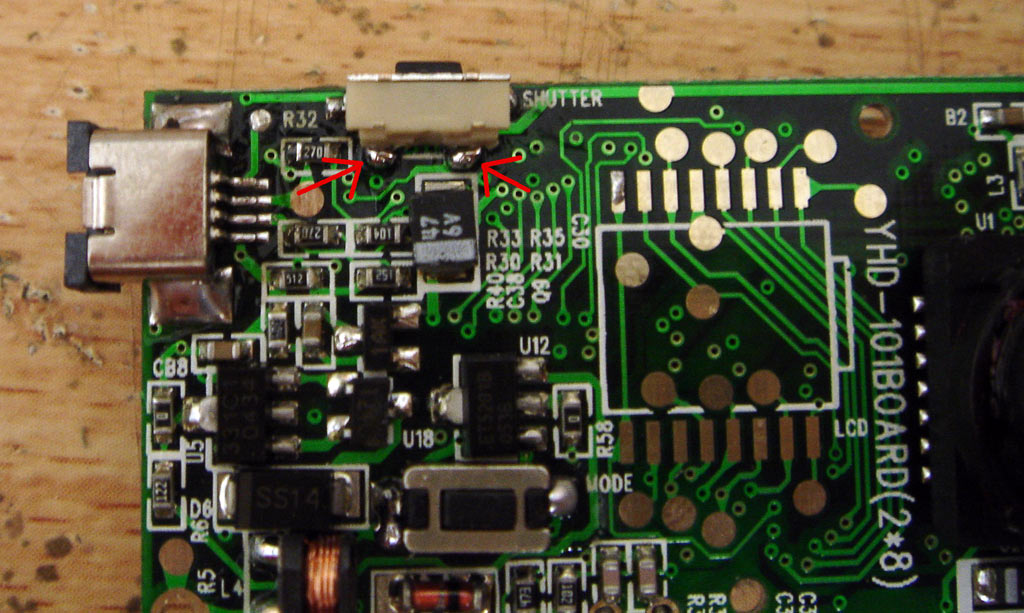
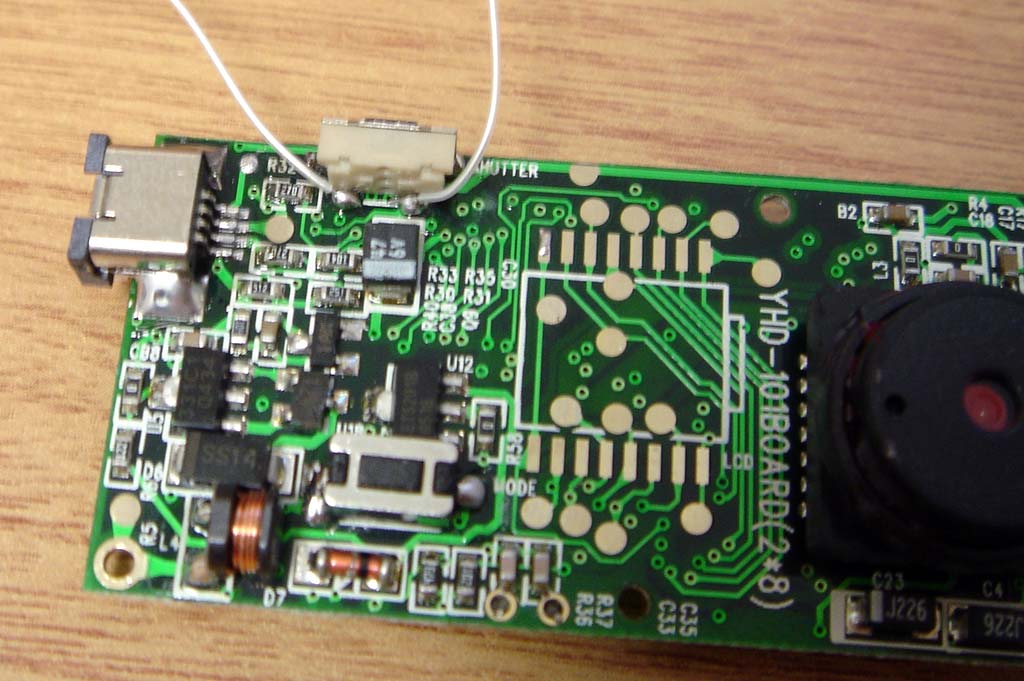
Take a close look at the circuit board. Now you see where the shutter switch is soldered to the circuit board? You want to solder a pair of wires to the switch leads, so you can take the switch's functionality outside of the camera. Thin, flexible wire will make things easier. In most cases it should be obvious which points to solder to, but if you are in any doubt, you can use the continuity function of your multimeter to see which points get shorted when you push the switch.


You can also throw away the plastic shutter button since the shutter will be controlled with PicoSwitch from now on.

Now for the hardest part - putting it all back together again!

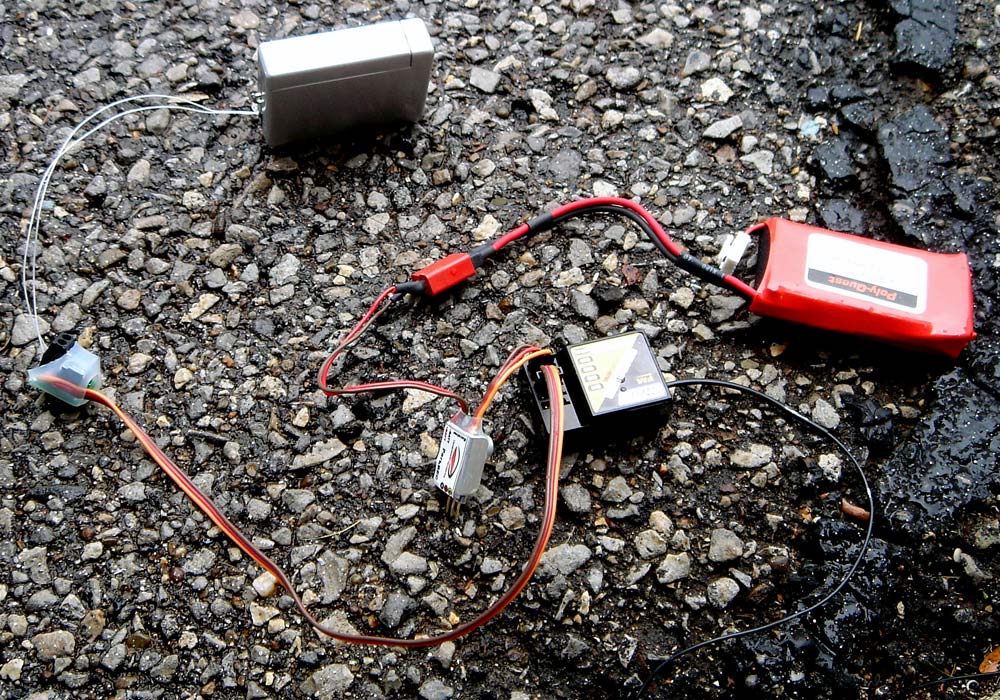
Once you have that taken care of, fasten the wires into your PicoSwitch. The polarity does not matter since it is a relay.

Next, plug PicoSwich into an empty receiver channel, set up your radio gear as normal, and power it all up. I used a ParkBEC for the photo here, but any 5V BEC will work to power the receiver+PicoSwitch. The camera has its own AAA battery for power.

Usage of this particular camera is a little tricky, because it has an auto-off feature after 30 seconds of inactivity. The way to get around this is to always have the shutter switch closed, and then when you want to take a photo, open the switch, then close it again. When the shutter switch is closed, it fools the camera into thinking that there is still something going on, so it won't shut down after 30 seconds. It sounds complicated, but it really only takes 10 seconds to master.
The total weight of the PicoSwitch + modified digital camera is 41g/1.5oz, which shouldn't noticeably hurt flight performance.
Here is a shot of John holding his radio and taking pictures of himself with the system. This picture was taken with the Philips camera shown in the pictures above. When it stops raining, we'll give AP a try!

Back to Dimension Engineering