PicoSwitch application note
Radio controlled Christmas lights
This guide will show you how to use a PicoSwitch in combination with your hobby radio control gear to control low powered mains voltage devices around the home. Christmas lights are a fun thing to try, because they are cheap, attractive, and very easy to work with. You won't even have to use a soldering iron for this project. This application involves working with mains voltages, so remember to exercise caution, and never touch live wires with bare hands. PicoSwitch makes this an easy project to do because it uses a relay switch, so no external transistors are needed.
First, pick up some lights from a local store and check that they work.


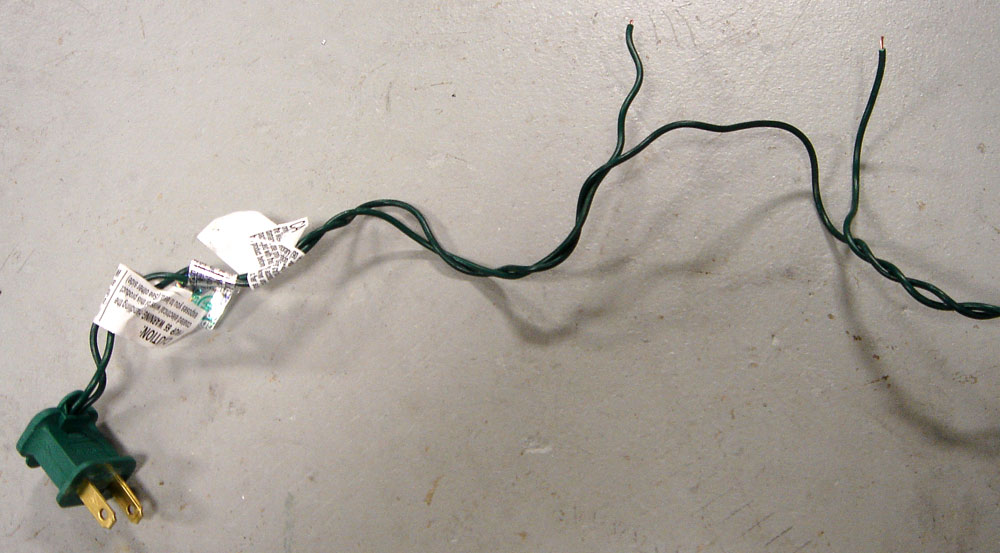
With the Christmas lights unplugged, cut and strip one of the wires leading from the plug. You should be left with two exposed wires, which will connect to PicoSwitch.

Securely fasten the wires into the screw terminals. Ensure that there is no exposed copper and ensure that there is no chance of the wires being pulled loose. Since PicoSwitch uses a relay, polarity does not matter so you can insert either wire into either terminal.

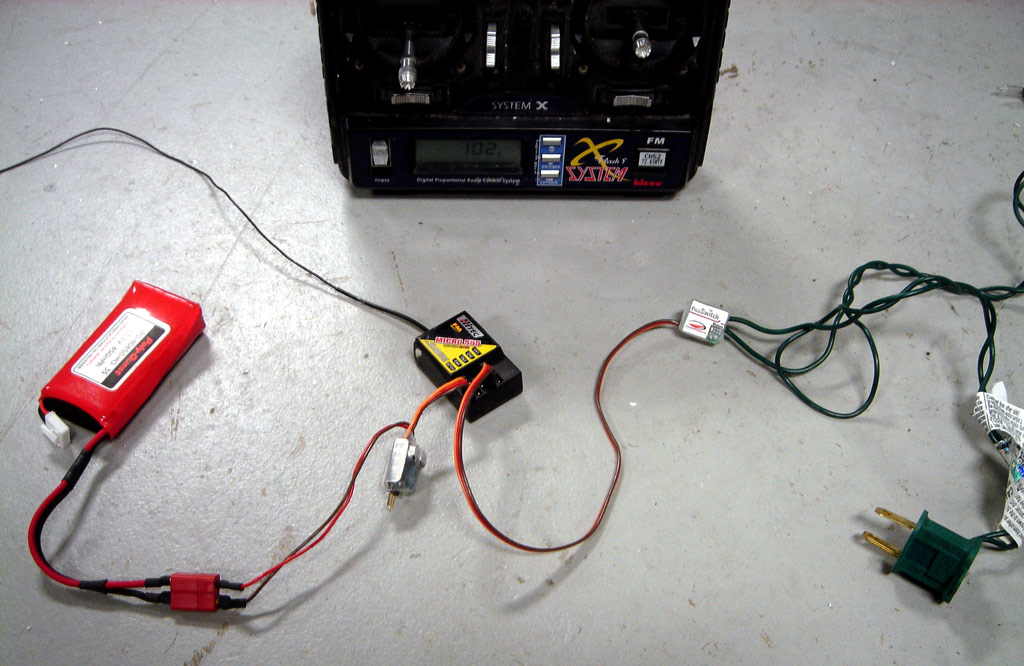
Next, plug your PicoSwitch
into a spare receiver channel, and set up your radio gear as normal. In this photo I am using a ParkBEC to power the receiver but any 5V BEC or receiver battery pack will do.

Before you plug the lights back into the mains, make sure that PicoSwitch is working the way you want it to by using your radio and observing the status LED. Remember, a blinking LED means no radio link, and when the LED is on, it means the switch is closed.

Once you are sure that everything is wired correctly and safely, plug the lights into the wall, and use your radio to turn them on and off. That's all there is to it!

Here is a video of the system in action, decorating some of our manufacturing equipment.
xmaslights.mpg (10.3mb)
xmaslights.wmv (1.8mb)
Back to Dimension Engineering