AnyVolt Mini application note
Powering your gadgets with USB
Overview
This project will show you how to use an AnyVolt Mini to make an adjustable voltage supply that will let you power lots of household gadgets (a pocket tv, Nintendo DS etc) from your computer's USB port. The 'Mini will help you do this by taking 5V from the USB port, and converting it into anywhere from 1.25V to 14V according to what your gadget requires.
Warnings and precautions
This article is aimed at electronics lovers who are familiar with usage of a multimeter, and understand the basics of volts, amps, watts, voltage regulators. Basic soldering skills are also necessary. The whole project can easily be completed in less than an hour.
The main thing to be careful of in this project is to make sure you never overload the USB port. The USB spec is 5V at 500mA max, which will work great with the AnyVolt Mini provided you don't overload it. This table should help you see whether or not you can safely power a certain device from your USB port in this project. Use a multimeter to check the current draw of each device before trying it in this project. For example, my cell phone needs only 5.2V to charge, but it draws a whopping 800mA, so I would never charge it using this project.
It goes without saying that a short circuit will make your motherboard cry.
| AnyVolt Mini's output voltage (V) |
Max current you should draw at output (mA) |
| 2 |
500 |
| 3 |
500 |
| 4 |
500 |
| 5 |
400 |
| 6 |
333 |
| 7 |
286 |
| 8 |
250 |
| 9 |
222 |
| 10 |
200 |
| 11 |
181 |
| 12 |
167 |
| 13 |
153 |
| 14 |
143 |
If you are in any doubt as to whether you can safely power a device in this way, then don't do it. The kids at school won't make fun of you if you don't have a USB powered Gameboy, but they will make fun of you if you fry your laptop's USB ports!
Recommended parts list
Protoboard
USB Cable
AnyVolt Mini
Small piece of female 0.1" pin header or a DIP chip socket
Screw terminals
Wire, solder, misc tools
Circuit Diagram
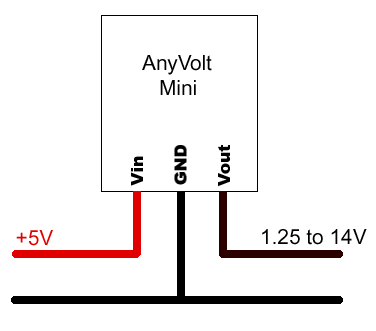
It's the classic voltage regulator circuit with a twist - now you can step voltage down and up.
Construction
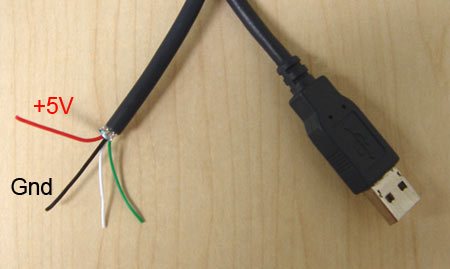
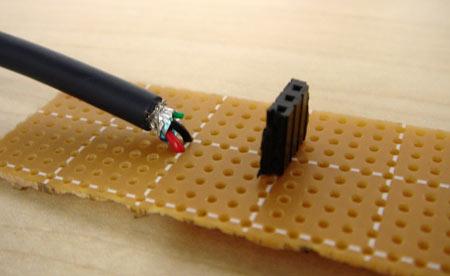
The project starts with a plain old USB cable. You can buy one for as low as $2. Whatever you do don't get a silly gold plated one for $25 at Best Buy!

Cut and strip the wires on one end of the cable and you will see the two wires that provide power to USB devices. They are almost always color coded as shown in the picture.
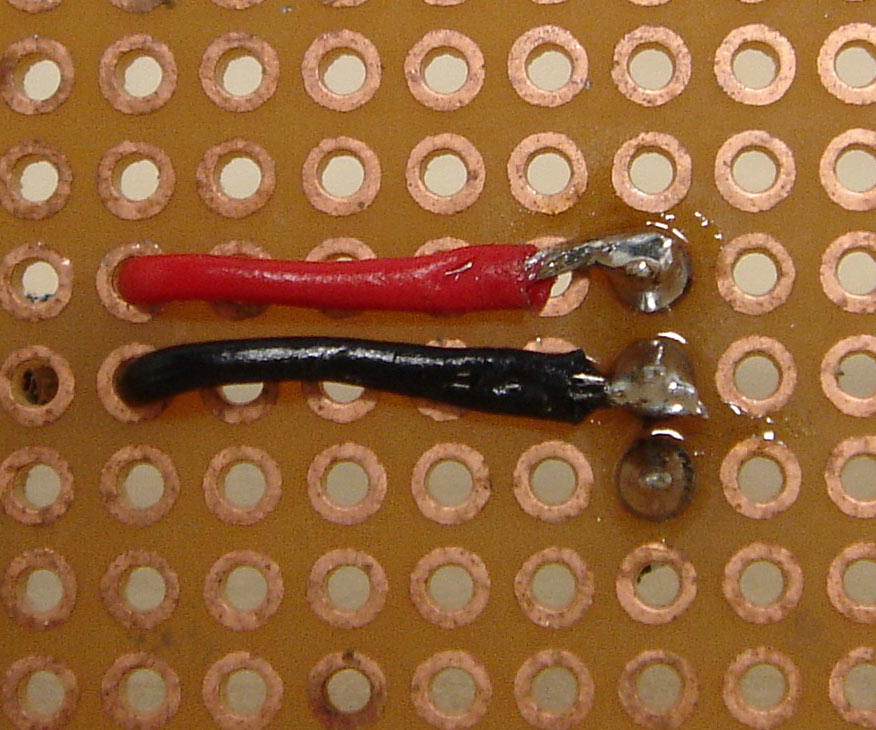
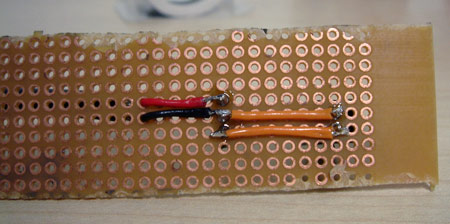
Solder the female header onto the breadboard and solder the power wires as shown. The header I used was Digikey part # 929974-01-36-ND but a chip socket from a local radio shack would have worked too.

The next step is to solder on the screw terminals. I recommend Digikey part # 281-1400-ND because the gripping mechanism on these terminals is perfect for quick wiring changes.

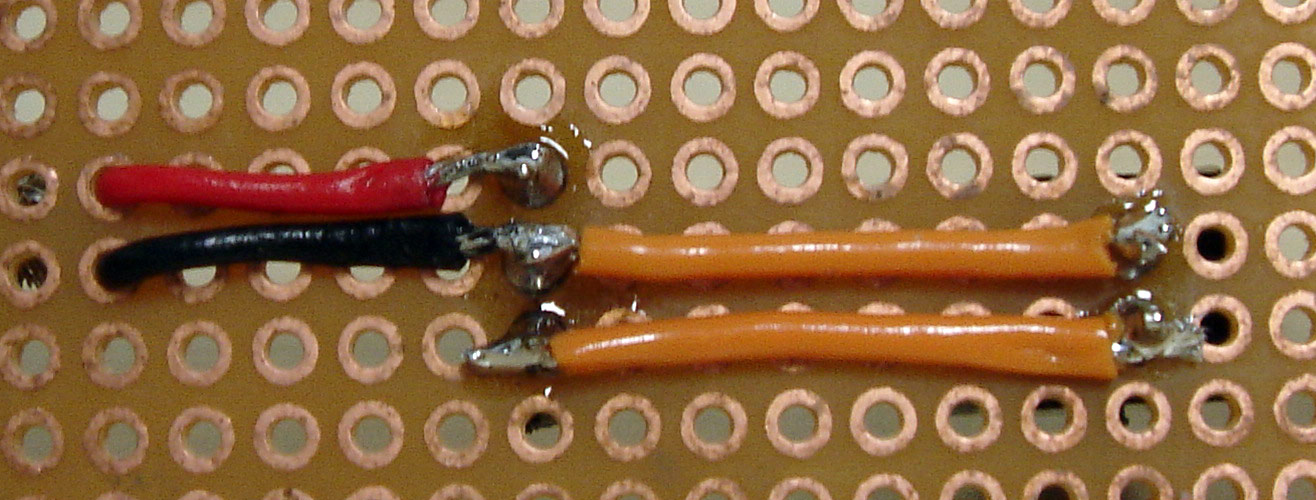
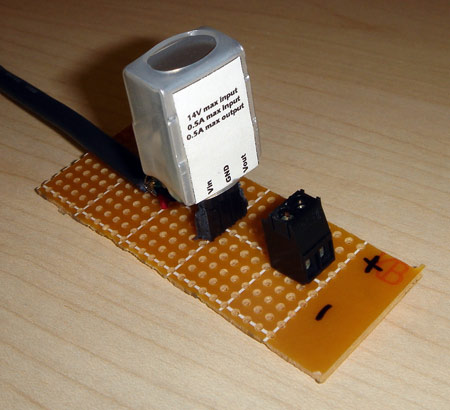
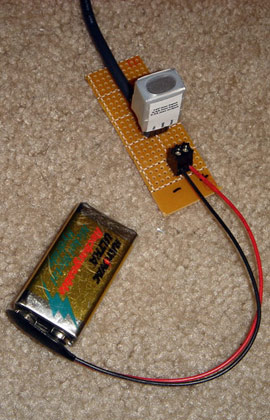
Finally, drop in the AnyVolt Mini with the correct polarity, and mark the polarity of the outputs near the screw terminals.
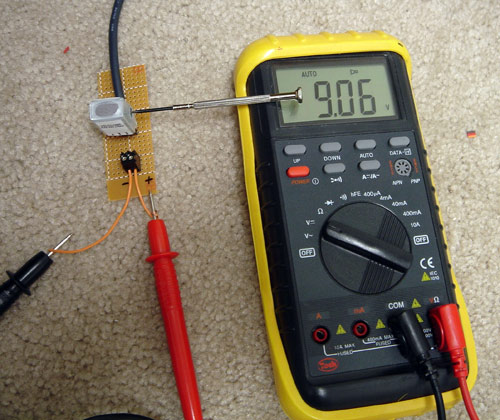
Use your multimeter and a screwdriver to set the output voltage to whatever you need it to be. In this case, I set it to 9V to charge a 9V NiMH rechargeable battery.
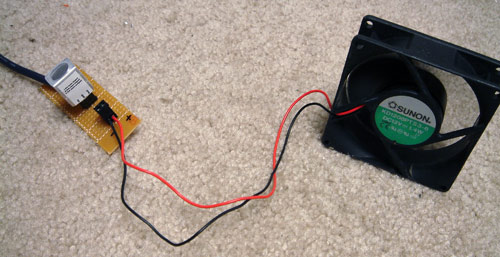
Here is the device powering a 12V fan at its proper voltage
Fully powering a laser projector at 6V
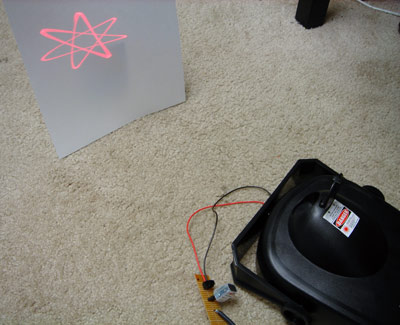
These are just some simple examples of what you can do with the adjustable voltage regulator. Depending on the current requirements, you could use this project to power a radio, MP3 player, CD player, FM transmitter, PDA, air freshener, Tiger handheld games, LED lighting, digital camera, Spiderman talking action figure etc. Just promise that you wont use it to power one of those annoying Furbys ok?
Back to Dimension Engineering