DE-ACCM application note
Building a simple vibration meter
Introduction
In this article, we will discuss how to make a simple vibration meter. A vibration meter can be used in diagnosing problems in engines, gearboxes, compressors, wheel balancing, vibration stress analysis and more.
Commercial vibration meters will typically cost $1000+, and may be more than your average hobbyist needs. The parts cost of this project is $85, and it gives you a basic vibration meter that could be used for comparative testing. There are many ways to make a vibration meter using microcontrollers and/or analog electronics, but this guide is aimed at people who have less experience with electronics. We will show you how you can make a vibration meter by soldering only 3 wires. This project can be done by anyone with intermediate soldering skills, and basic knowledge of electronics and multimeters. It should take about an hour.
Parts list
DE-ACCM3D accelerometer with built-in voltage regulator
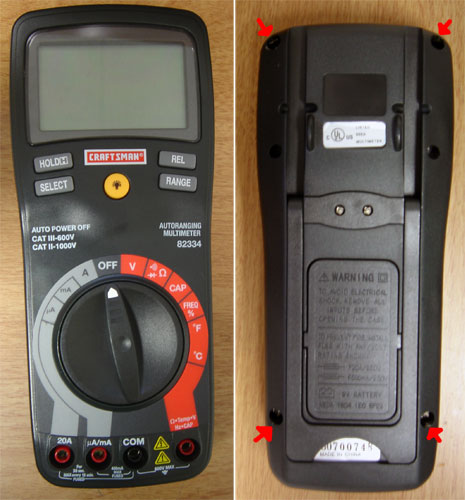
Craftsman 82334 autoranging multimeter (or an equivalent quality multimeter)
Misc wire and soldering tools
What to do
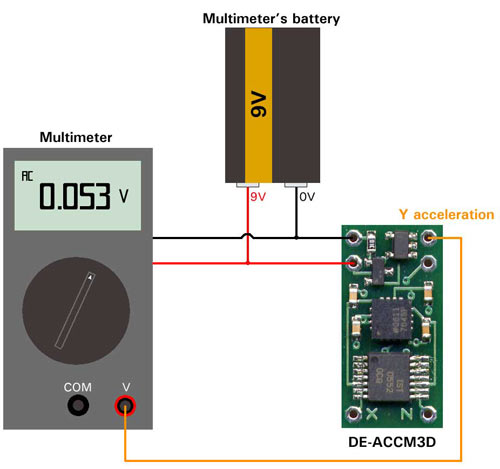
Basically we will be powering the accelerometer from the 9V battery inside the multimeter, then connecting the analog acceleration/vibration output to the voltage input of the multimeter. By setting the multimeter to read AC mV, we will see a voltage level that will be directly proportional to the amount of vibration.
The Craftsman 82334 was chosen because it ran off a 9V battery, has good sensitivity/accuracy (0.1mV/0.5%) and it has a frequency function with a wide AC bandwidth. It would be possible to do this project with a cheaper multimeter, but remember, you get what you pay for! If you want to go all out, then get a multimeter with True RMS measurement or a handheld oscilloscope. A handheld oscilloscope would allow you to see the exact vibration waveform.
Although in this application we are only using one acceleration axis, we are using a triple axis accelerometer. The reason for this is that the DE-ACCM3D has a built in 3.3V regulator, and we want to keep things as simple as possible in this guide. If you feel comfortable soldering up an additional voltage regulator circuit, then you could accomplish the same goal using a DE-ACCM2G and it would be a little cheaper.
How to do it
First, remove the battery from the multimeter and unscrew the back panel.
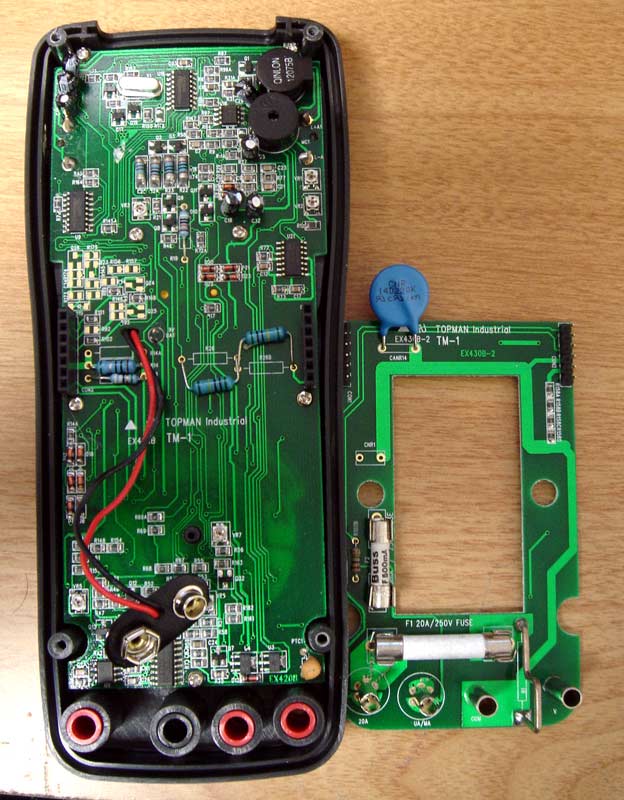
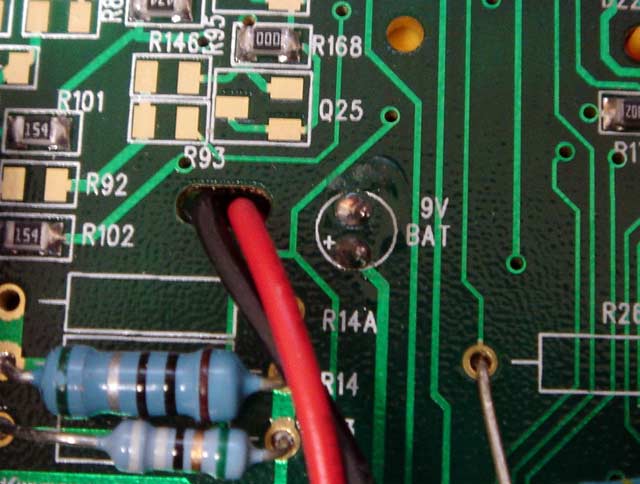
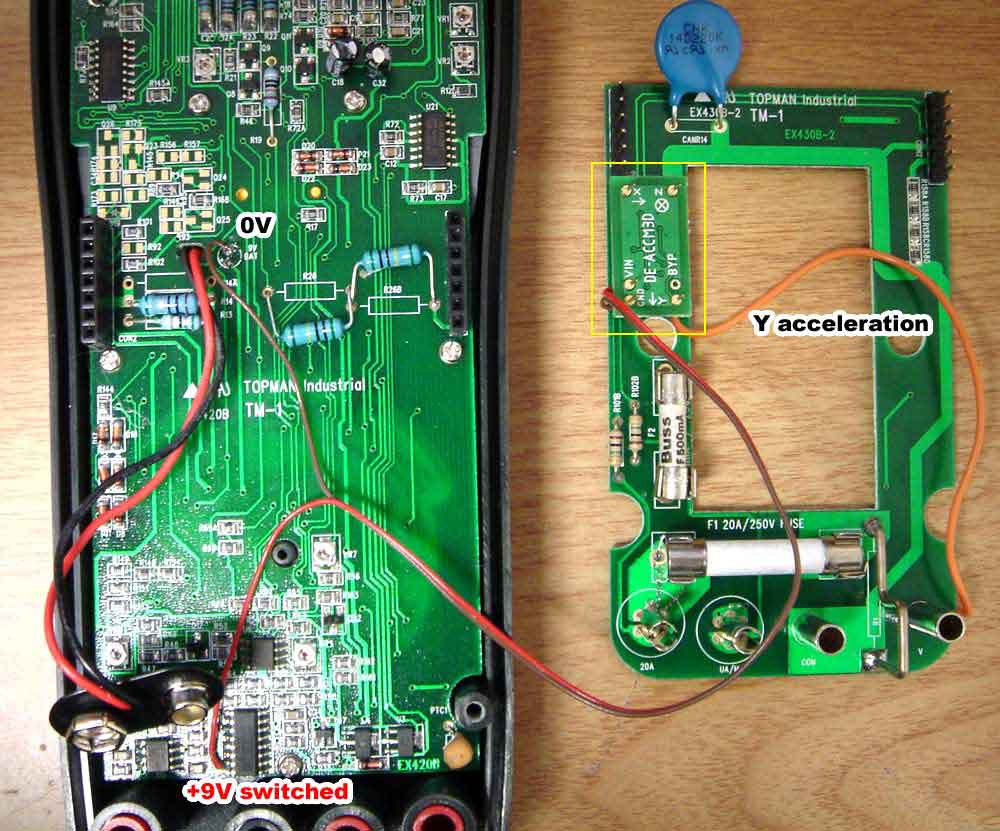
Open the multimeter up, and locate the point on the PCB where the battery wires are connected. Connect the +9V wire to Vin on the accelerometer, and the - wire to GND on the accelerometer. Solder a connection from the Y axis of the accelerometer to the voltage input on the multimeter. For the sake of simplicity you can wire the accelerometer directly in parallel with the battery as shown here:
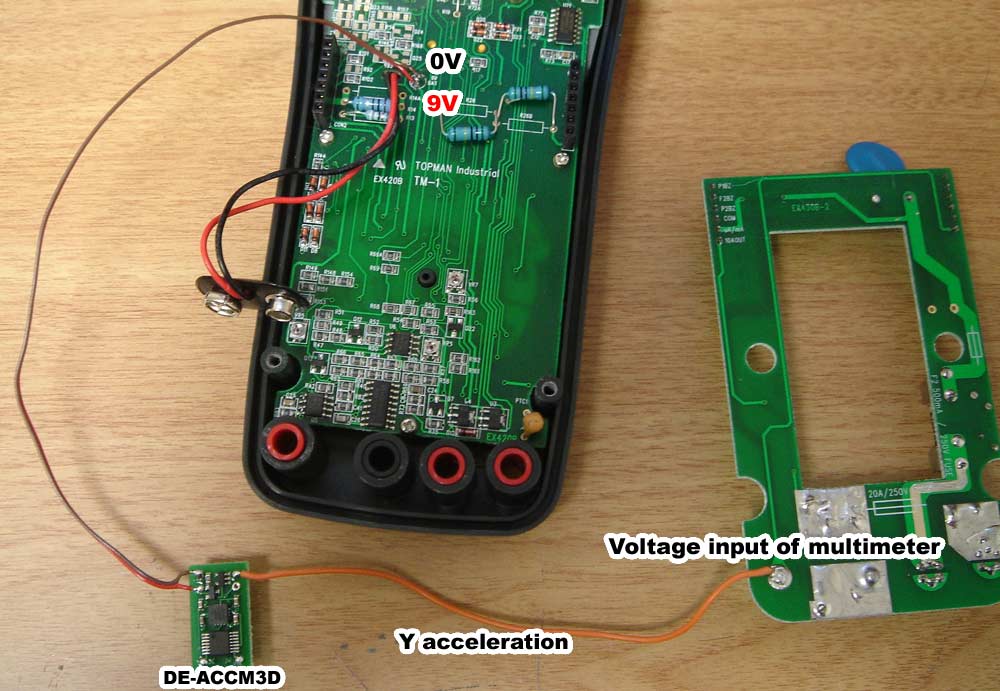
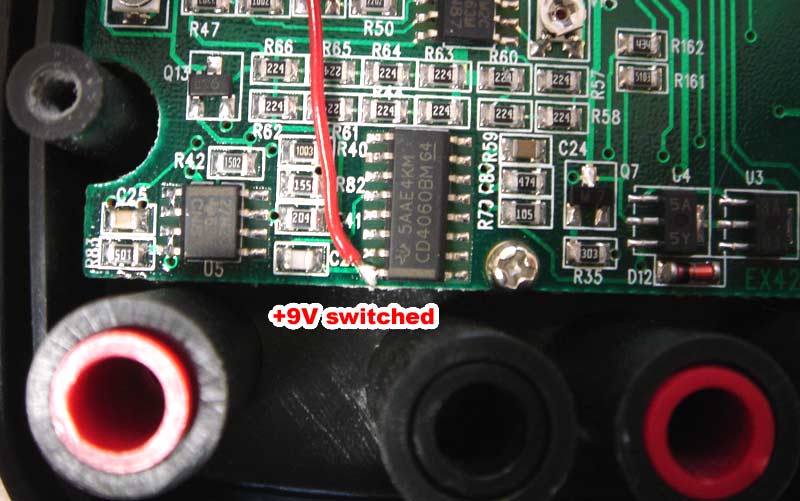
If you would like to be able to switch the accelerometer on and off at the same time as activating the multimeter, you could add a small switch, or take power from pin 16 of the CD4060 chip. If that sounds too complicated, stick with the simple solution above!
Next, hot glue the accelerometer to an empty space inside the multimeter. Try to align it perfectly vertically, so all the vibrations experienced in the Y direction will be measured.
Finally, set the multimeter to measure millivolts AC or frequency. If you did things right, you should see 0V when the device is sitting still, and about 200mV when you shake it around.

To use the vibration meter, just attach it to the device under test. Try not to dampen any vibrations with your hands.
Results:
vibration_meter.avi (5mb) (DivX)
vibration_meter.wmv (3mb)
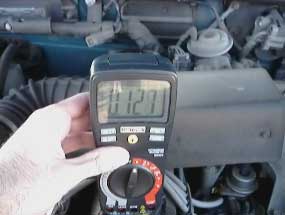
Here is a video measuring the vibration of Tom's truck engine at various RPM levels. The highest reading was 130mV which at 333mV/g corresponds to 0.39g.
Additional notes:
With very minor changes, you could make a probe-style vibration sensor that could plug into the multimeter from the outside. You would just need a separate 9V battery or 3 AA batteries to power the accelerometer. You could then tape, glue or bolt the accelerometer module onto hard to reach areas.